On this page
- 1. Chasing the humidity number
- 2. Skipping the test run
- 3. Turning eggs or peeking during lockdown
- 4. Trusting a single thermometer
- 5. Helping chicks hatch too early
- 6. Setting old, dirty or washed eggs
- 7. Putting the incubator in the wrong spot
- 8. Never checking the hygrometer
- 9. Mixing species without a plan
- 10. Throwing eggs out after one bad candle
- 11. Not having the brooder ready
- Frequently asked questions
The most common first-time hatching mistakes are opening the lid to fix humidity, skipping a 24–48 hour test run, trusting the built-in thermometer, turning eggs after lockdown (day 18 for chickens), and helping chicks out too early, since 12–24 hours from pip to hatch is normal. Set fresh, unwashed eggs, hold 99.5°F (37.5°C), and ready the brooder early.
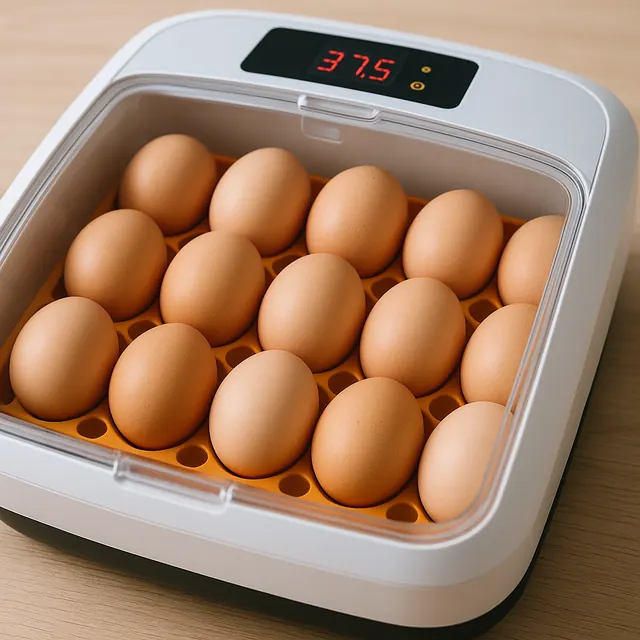
1. Chasing the humidity number
Opening the lid to add water or wipe condensation does more damage than slightly-off humidity. Every opening drops temperature and humidity at once, and the incubator then overshoots while it recovers. Humidity is about total moisture loss over weeks, not the reading at any one moment, so a day at 38% or 55% will not ruin a chicken hatch. Pick a target (40–50% for chickens), add water through an external port if you have one, and judge results by the air cell at candling. Our humidity guide shows how to read the air cell and track weight loss.
2. Skipping the test run
Run the incubator empty for 24–48 hours before you set a single egg. A new machine needs time to settle, and you need time to see how it behaves through a full day and night of room temperature changes. Adjust until a second thermometer at egg height reads 99.5°F, then leave it alone. A test run also catches a dead fan or a turner motor that clicks but doesn't move.
3. Turning eggs or peeking during lockdown
Stop turning three days before hatch: day 18 for chickens, day 25 for most ducks and day 15 for Coturnix quail. In those last days the chick is moving into hatching position and drawing the yolk into its body; turning works against that. Lockdown also means the lid stays shut. Opening it to "check" lets humidity crash, and the membrane of a pipped egg can dry and shrink-wrap the chick.
4. Trusting a single thermometer
Built-in sensors on budget incubators can be 1–2°F off, and cheap sensors drift over time. That is enough to make chicks hatch early and weak, or late and sticky. Put a second calibrated thermometer at the height of the top of the eggs, where the embryos actually are, and trust the one that agrees with a third reference if the two disagree. University of Kentucky extension guidance puts forced-air incubators at 99–100°F, which leaves little room for a drifting sensor.
5. Helping chicks hatch too early
A chick that has pipped but not zipped is usually still absorbing blood vessels and yolk. Twelve to 24 hours from external pip to hatch is normal for chickens, and ducks can take 24–48 hours. Pulling shell away early tears live vessels and can kill a chick that would have hatched on its own. Only consider helping after a full 24 hours with no progress, and follow the steps in our stuck-chick guide.
Patience rule of thumb: if a chick is still chirping and breathing through its pip hole, it is working. Silence plus no progress for 24 hours is the time to look closer, not a slow first few hours.
6. Setting old, dirty or washed eggs
Hatchability falls noticeably after about 7 days of storage, so set eggs as fresh as you can. Store them pointy end down at 55–65°F, and tilt them daily if you're holding them more than 3 days. Never wash hatching eggs: washing removes the bloom, the natural coating that keeps bacteria out of the pores. Choose clean eggs to begin with, and gently dry-brush light dirt rather than scrubbing.
7. Putting the incubator in the wrong spot
A small incubator can only hold temperature as well as the room around it allows. Aim for a room that stays between 65 and 75°F, away from sunny windows, heating and cooling vents, and exterior doors. A sunny afternoon can push a tabletop unit several degrees over target in an hour. Interior rooms, closet shelves and basements with steady temperatures work well. Garages and sunrooms rarely do.
8. Never checking the hygrometer
Humidity sensors drift even more than thermometers, and many are off by 5–10 points out of the box. Check yours with a salt test: put a capful of table salt dampened to a wet-sand texture in a sealed zip bag with the hygrometer for 6–12 hours. A correct sensor reads 75%. Note the difference and adjust your targets by that amount.
9. Mixing species without a plan
Chicken, duck and quail eggs all incubate at 99.5°F, but they hatch on different days and need different lockdown dates. Set them on the same day and the quail hit lockdown on day 15 while the ducks still need turning for another 10 days. If you want a mixed hatch, stagger the set dates so every egg reaches lockdown together. The hatch date calculator works backwards from a hatch date, and the settings chart in our main hatching guide lists each species' days.
10. Throwing eggs out after one bad candle
Dark brown, speckled and blue shells are hard to read, and an embryo on day 4–5 can be easy to miss. Unless you see a clear blood ring, mark doubtful eggs with a pencil and re-check them on day 10 or 14 before discarding. The exception is any egg that smells, oozes or looks cloudy and dark all over: remove it right away, because rotten eggs can burst and contaminate the rest. Our candling guide shows what each stage should look like.
11. Not having the brooder ready
Chicks can stay in the incubator for up to 24 hours after hatching, and that window goes fast. Set up the brooder a few days early and run the heat so you can confirm about 95°F at chick level for week one. Have starter feed, a shallow waterer and non-slip bedding in place. Paper towels over the bedding for the first days help chicks find their feet and their food.
Frequently asked questions
What is the biggest mistake new hatchers make?
Opening the incubator too often, usually to adjust humidity or check on eggs. Each opening drops temperature and humidity together, and during lockdown it can dry the membranes of pipped eggs. A steady incubator with imperfect humidity almost always beats one that is opened several times a day.
How long should I run an incubator before adding eggs?
Run it empty for 24–48 hours. That is long enough to see how it holds temperature through a day and night, verify the reading against a second thermometer at egg height, and confirm the turner and fan work before anything valuable is inside.
Is it bad to open the incubator once during lockdown?
A single quick opening to remove a broken egg is rarely fatal, but avoid it when eggs have pipped. If you must open the lid, warm the room and raise its humidity first, work in under a minute, and close up fast so the incubator can recover.
How old can hatching eggs be?
Up to about 7 days for the best results. Eggs stored longer can still hatch, but the rate drops each extra day. Keep stored eggs pointy end down at 55–65°F with roughly 70–75% humidity, and let them warm to room temperature for 6–8 hours before setting.
Can I use the incubator's built-in hygrometer?
You can, once you've checked it. Do a salt test: seal the sensor in a bag with damp table salt for 6–12 hours. An accurate hygrometer reads 75%. If yours reads 68%, add 7 points to every reading from then on.